What is Webauthn and why should I care?
Disclaimer: This website is a work in progress.
Webauthn (short for Web Authentication API) is a technology developed by the W3C and the FIDO Alliance. It provides a way to securely sign in to websites using public key cryptography. Webauthn can be used to replace a password completely (a use case commonly called “signing in with a passkey”), or as an additional security measure on top of password authentication.
As of 2024, Webauthn is supported by all major desktop and mobile browsers and across all three major desktop operating systems (GNU/Linux, MS Windows, and macOS).
The purpose of this website #
The aim of this website is to describe the process of integrating Webauthn on your website. I will try to keep the instructions mostly backend-agnostic, and if I do present any examples of back end code, they will be written in the languages I am most familiar with (Elixir and Go). JavaScript usage is mandatory, as the Web Authentication API in browsers is only exposed through a JavaScript interface.
When I tried to implement Webauthn in my own projects, I found out that there are no comprehensive learning resources for developers interested in this technology. The two main websites dedicated to Webauthn, webauthn.io and webauthn.guide present only a superficial view of Webauthn, and omit most of the technical details completely. Even the documentation and demo projects for Webauthn in specfic programming languages tend not to explain many of the important parts of the integrations, such as:
- How to parse and serialize binary data sent by the back end?
- How to store the public keys and authenticator metadata in a database?
- What are all those cryptic options in the JavaScript APIs (
navigator.credentials.createandnavigator.credentials.get)? - How do these options influence the security of my application?
- Who the heck is Alice?
Starting from May 7th, 2024, I intend to spend an hour each day working on this website, for at least a month.
Web Authentication workflow #
The Webauthn workflow can be divided into two steps: registration and authentication. Registration is the process of registering an authenticator device and storing its data in the back end of an application. Authentication happens when the user wants to prove their identity to the server, usually during a sign on process.
It is important to note that there is no codified protocol for client-server communication in the Webauthn workflow. Only the options passed to navigatior.credentials.create and navigator.credentials.get are standardized, and even this protocol has varying degrees of support across browsers. In fact, you only need JavaScript to call these two functions, during the registration and authentication process, respectively.
Registration #
When a user wants to register their authentication device (passkey) in a Webauthn workflow, the back end server generates a random “challenge” (a long string of binary data). This challenge is sent to the browser over HTTP (and a copy of the challenge data is stored in a session storage, e. g. in an encrypted and signed cookie), after which the browser calls the asynchronous API navigator.credentials.create. At this point, if the options passed to navigator.credentials.create are correct and the browser supports the Webauthn API, the browser should present a pop-up to the user, listing the possible options to register an authenticator device. The exact appearance of this pop-up will be different on different platforms and browsers.
Below is an example of such pop-up in MS Edge on Linux:
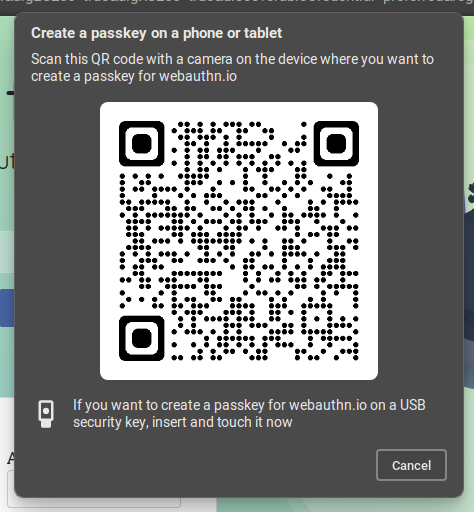
Firefox on Linux does not support QR codes or Touch ID. When a website calls navigator.credentials.create, we can only create a credential using a “roaming authenticator,” which is a fancy name for a hardware key, such as the Titan Security Key or Yubico Security Key.
Once the user chooses a hardware authenticator, the device generates a keypair that it stores in persistent storage. Using the private key, the authenticator signs the challenge generated by the server and returns it to the browser, together with the public key and other metadata. The solved challenge, together with the key metadata, can then be serialized and passed back to the backend. The server retrieves the original challenge from the session store and verifies the answer. At this stage you may also pass additional metadata to the server, such as a human-readable name for the newly registered authenticator device, or the current user’s password.
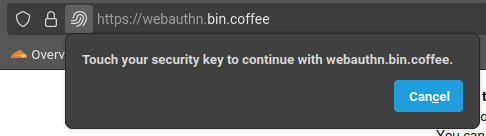
Authentication #
After a user has successfully registered a passkey with the backend, they can use this passkey to securely verify their identity. First, the backend generates a random authentication “challenge” (a long string of binary data) and sends it to the browser over HTTP. A copy of the challenge is persisted in a session store. The backend also serves a list of public keys associated with the user and passes it along with the challenge, so that the browser can check if any known or discoverable device exposes any matching key.